Color matching in Photoshop is an essential technique to visually consistency by different images. Whether…
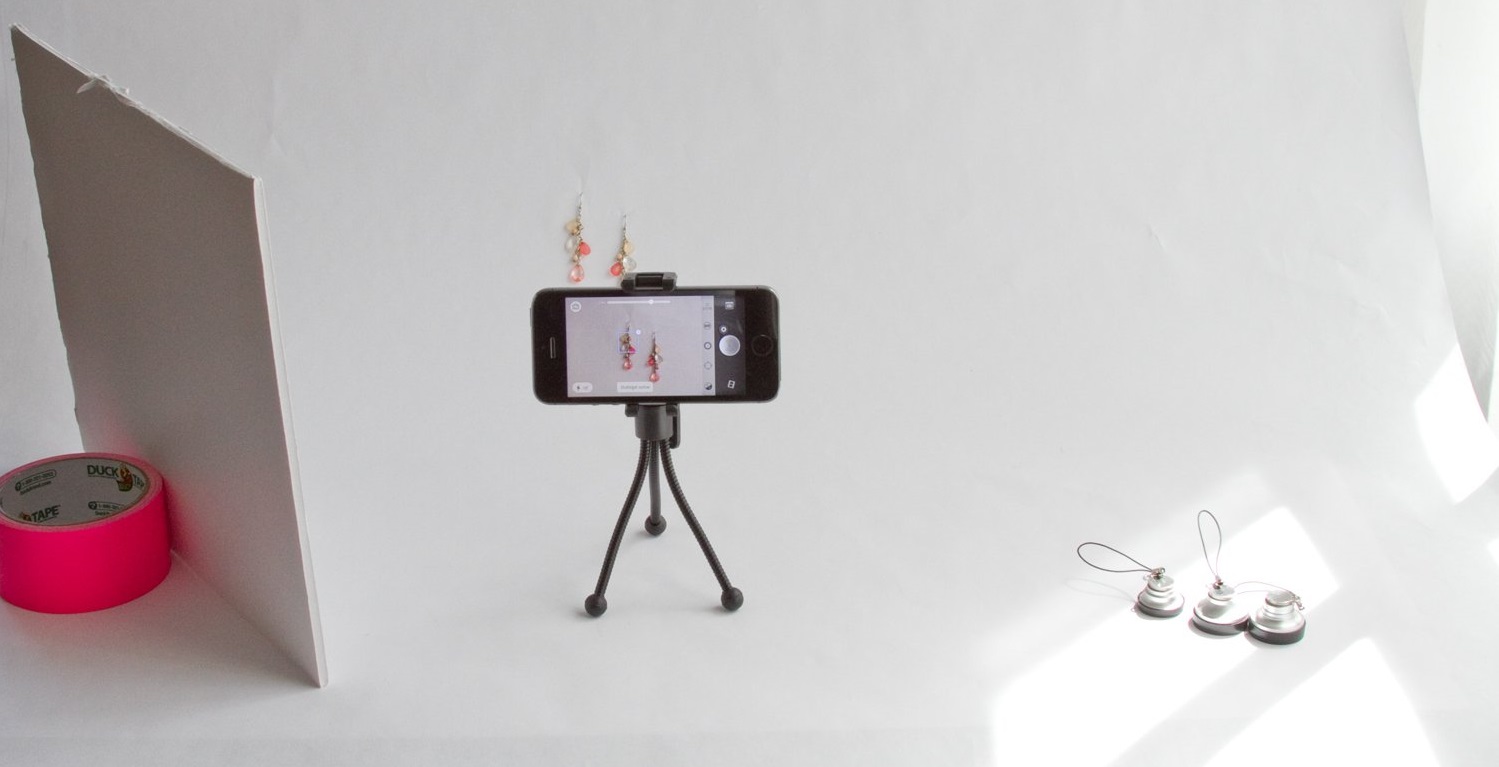
Smartphone Photography- How to Take Professional Product Photos by Smartphone
You product photos for WebShop play a tremendous part in the success of your business. Although, it may be intimidating to take your photos using a full fledged DSLR camera but unfortunately not everyone have the budget to do so. You don’t need to fret though, because you can take great quality product photos for WebShop or online store with your fancy smartphone knowing some techniques of Smartphone Photography.
Smartphone photography is not new to those who are related to the subject of photography. There are numerous ways for you to take photos of your product professionally using your smart phone.
Step how to do best Smartphone Photography
Below we’re going to give you easy steps for making the best out of your smartphone to pullout eye-catching product Photoshoots:
 1st Step: Preparation
As a saying goes “Victory loves preparation”, smartphone photography also starts from preparation – the Photoshoot part comes later.
1) Selection of Smartphone
You smartphone camera should be of high quality, the modest of which must be 8 megapixels with all the bells and whistles of a smartphone camera.
2) Catch up with Camera Options
You need to know all the settings of the camera to get the best out of it. Options like zooming, grid, exposure, color balance can affect the end result. So get comfortable with them before aiming for the product Photoshoot.
3) Background Selection for Photoshoot
You need to create an effective background for your product Photoshoot. The recommended one is a white background as it is an industry standard and shows the product more clearly.
4) Lighting
As we are discussing budget friendly Photoshoot, so you should go with the easiest one – sunlight. A piece of advice, don’t try to take photos on a very harsh light conditions because the photo will become too grainy. That’s why you need to use soft light with white paper or board to reflect light to the product for optimum results.
2nd Step: Photoshoot
Now, it’s time for you to place your product to the best lighting spot you’ve chosen and start capturing the best angles.
1) Steady Hands
You need to have steady hands for making better product photos for WebShop. In smartphone photography, usually there are no tripods used, but if you’re more of a perfectionist you can always employ a tripod for ‘really’ still photos.
2) Multiple Photos
During Photoshoot of product photos of your WebShop, don’t make the mistake of taking one or very few photos. While you have the chance, take at least 10-15 photos of your product from different angles to choose the best from them later.
3rd Step: Photo Editing
Although product photo editing may sound like an optional step, but take our word – it’s not!
1) Select the Best Photo
If you’ve captured many photos of your product during product Photoshoot, it’s time for you to analyze all the photos and choose the best of the lot.
2) Employ a Professional Photo Editing App
You need to work on an app to raise the level of your product photo editing and your smartphone photography. Although there are many apps for you to select from, but we recommend Adobe Photoshop Express. As it’s free and another good news is that it is available for both Android and iOS.
3) Core Editing
Now open up your photo editing app and operate with the various options. Your product photo editing is only limited to your creativity, so expand your mind and try different settings like brightness, white balance, contrast, sharpness, cropping and many more.
So that’s it, wasn’t that tough right? Your own guide for smartphone photography accompanied with fancy product photo editing options is here for you to follow – to get perfect product photos for WebShop.
By following the above steps you can stun your customers with alluring product photos, which will definitely shine your product as well as your business.


Comments (0)